Creating a Private Composer Repository on GitHub

If your organization has internal PHP packages that need to be distributed, but you don’t feel comfortable hosting them on Packagist, hosting your own private composer repository can be a good solution.
This article will walk through the steps of setting up a private composer repository hosted on GitHub Pages, using the Satis package. We’ll go through setting up the project and getting it up and running on GitHub Pages. In future posts, we’ll work on adding and updating packages and automating those processes using GitHub workflows.
Setting Up the Repository
To get set up, you’ll want to ensure you have a supported version of PHP and composer installed. Choose a project location, create the directory and run the initialization script provided by Satis.
1
2
3
$ mkdir ~/Projects/composer-repo
$ composer create-project composer/satis:dev-main ~/Projects/composer-repo
$ cd ~/Projects/composer-repo
This will generate the boilerplate code necessary to manage the project. Since we will ultimately be hosting this repository on Github, let’s go ahead and initialize the repository and add a .gitignore file.
1
2
$ git init
$ touch .gitignore
There are a variety of .gitignore configurations you can use for PHP/composer projects, but for the sake of simplicity, the following should do the trick:
1
2
3
4
.DS_Store
composer.phar
/vendor/
Initializing Satis
At this point, we need to decide where our repository will be hosted. If you’re not using a custom domain, the site will be hosted at a default location that uses the pattern https://<username>.github.io/<respository-name>. So with the username of “bilbo” and the repository name “composer-repo”, the site would be hosted at https://bilbo.github.io/composer-repo. We’ll use that username/repo combination in the example code below.
To initialize the repository, we’ll use a built-in command:
1
2
3
4
5
6
7
8
9
10
11
12
13
$ php bin/satis init

  Welcome to the Satis config generator

This command will guide you through creating your Satis config.

Repository name: bilbo/composer-repo
Home page: https://bilbo.github.io/composer-repo

  Your configuration file successfully created!

You are ready to add your package repositories
Use satis add repository-url to add them.
This will create a satis.json file in the root of your project. This is where your repository configuration will be stored. It should look something like this:
1
2
3
4
5
6
{
    "name": "bilbo/composer-repo",
    "homepage": "https://bilbo.github.io/composer-repo",
    "repositories": [],
    "require-all": true
}
Since we want to build the site to the docs/ directory by default, we can add this to our configuration file.
1
2
3
4
5
6
{
    ...
    "repositories": [],
    "output-dir": "docs/",
    "require-all": true
}
Generating the Site
We’re now ready to build our project and make our first commit. The site won’t have any packages listed, but this will allow us to make sure everything is working as expected.
1
2
3
4
5
$ php bin/satis build
# The command will target satis.json by default,
# and we've configured the output directory in the satis.json.
# If we needed to specify an output directory, we could use the following command:
$ php bin/satis build satis.json docs/
After running the command, you should see a fully generated static site in the docs/ directory!
1
2
3
4
5
docs/
  include/
    all$relativelylonghash.json
  index.html
  packages.json
It will include an index page and a directory named include/ that will have the JSON files that describe each of your packages. Since we currently don’t have any packages, only the all$<hash>.json file is currently in this directory. Let’s go ahead and finish setting up by committing our code to a repository (this assumes you’ve already set up the GitHub repository).
1
2
3
4
$ git add --all
$ git commit -m "Initial commit"
$ git remote add origin git@github.com:bilbo/composer-repo.git
$ git push -u -f origin main
GitHub Pages
Now that we have the repository and the initial HTML created, we need to get the site up and running on GitHub using their Pages feature. As noted above, for this example we’ll be using the docs/ directory to store our HTML files, which is a well-established pattern for hosting GitHub pages. To get things set up, head to the Settings page of your repository and select “Pages” from the left navigation. You should be presented with the following options:
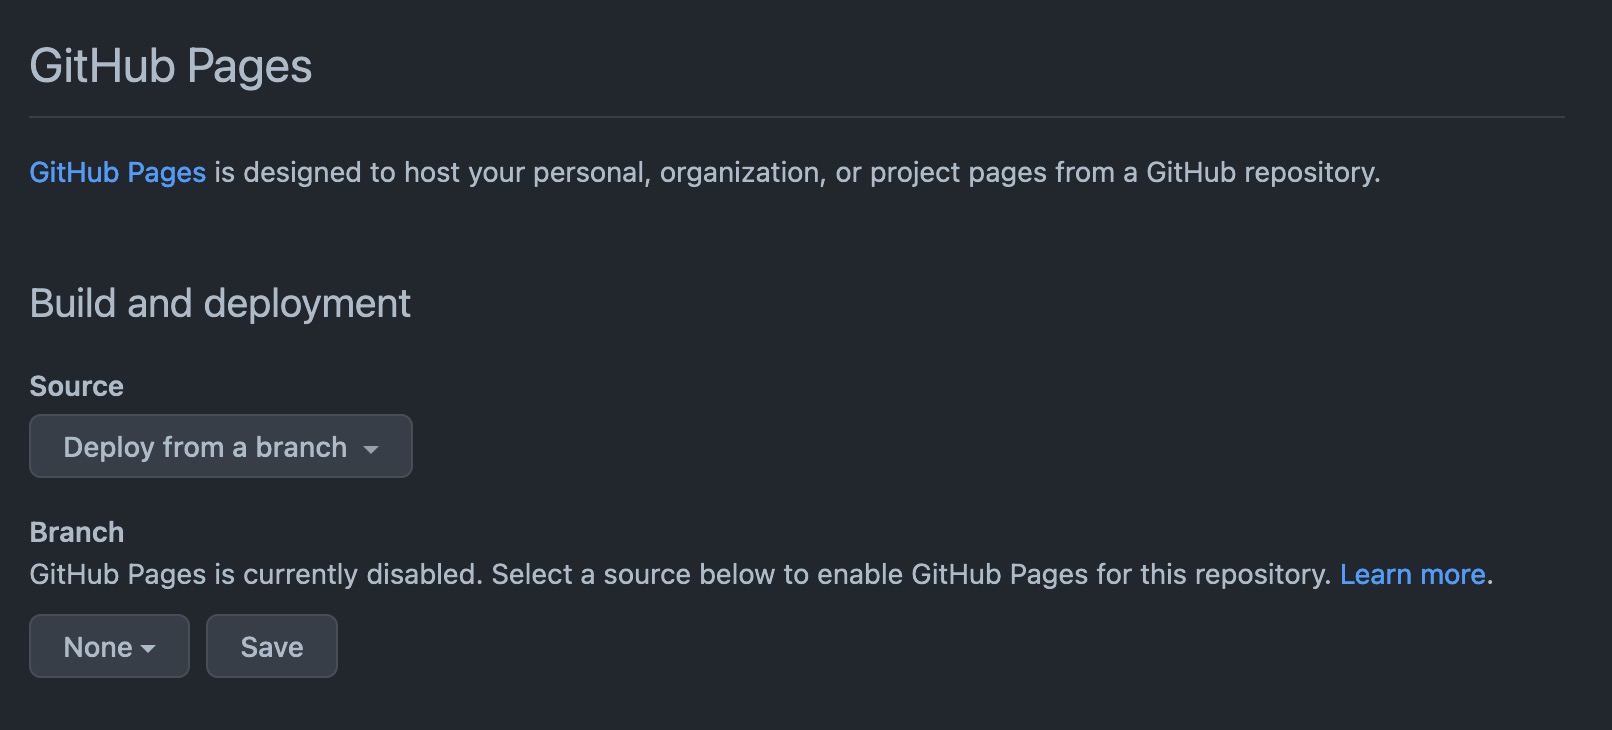 Screenshot of the default GitHub Pages settings
In order to configure our GitHub Pages, we’re going to want to “Deploy from a branch” and in most cases we will want this to be the main branch. Once you’ve selected the branch, an additional dropdown will appear asking you which directory you want to serve up, with the /(root) directory being the default. Update this to docs/.
 Screenshot of the branch and directory configuration
Once you’ve clicked the Save button, the initialization process will begin. Once it has completed, you should see a link to your live site on the GitHub Pages setting page.
Final Thoughts
If you’ve made it this far, congratulations! You now have a working composer repository hosted on GitHub pages. Of course, we haven’t yet added any packages to our repository, but we will be knocking that out in my next post, along with some basic automation using GitHub workflows.
To review, we were able to accomplish the following in this article: