Creating an RPG API in Python Django (Part 1)
One of my favorite exercises when learning a new language is building out a simple, text-based RPG battle system. I tend to follow object-oriented programming (OOP) patterns, and RPGs lend themselves nicely to those patterns. In cases where a language is better suited to functional patterns, I challenge myself to find functional approaches to the common tasks that need to be performed within a battle system.
This week we’ll be looking at creating a REST API using the Python framework Django. We’ll be focusing on defining the data structures and providing CRUD (Create, Read, Update and Delete) interfaces for that data, as this is at the core of any REST API.
The Scenario

I’m a huge Final Fantasy fan and for a time played both of their MMO titles, Final Fantasy XI and Final Fantasy XIV. After relaunching XIV as A Realm Reborn, SquareEnix introduced The Loadstone, an official site for all things Final Fantasy XIV, including a really nice interface for viewing your character’s data. Your profile would display your current stats, job, equipment and various other data points about your character. While I’m not certain of this, my assumption is the character data stored in the game servers were copied over to separate servers for display within The Loadstone site.
The project we’ll be launching in this post will emulate this functionality. Our goal is to create data structures that can accurately describe the state of a character, their equipment, abilities and stats. We do not need to worry about transient states or other pieces of data that might need to be stored if were we building stateful data structures within a game engine.
The Setup
I’ll be setting up a virtual environment for my project and using Python 3.11.1. I use Pyenv to switch between Python versions, which is really useful if you’re working on multiple projects every day. To get the virtual environment setup, I will run the following:
1
2
3
4
5
6
$ cd ~/projects
$ mkdir rpgapi && cd rpgapi
$ pyenv shell 3.11.1
$ python --version
Python 3.11.1
$ python -m venv .venv --prompt=rpgapi
Now with the virtual environment setup, we need to go ahead and activate it so that our packages are installed in the right place.
1
2
$ source .venv/bin/activate
(rpgapi) $
We can handle installing our dependencies either directly via pip or through the pyproject.toml we’ll be creating shortly, but for the sake of just getting the project outline, let’s install Django with pip for now.
1
2
3
4
5
6
7
8
9
10
(rpgapi) $ pip install django==4.2.2
Collecting django
  Downloading Django-4.2.2-py3-none-any.whl (8.0 MB)
     ━━━━━━━━━━━━━━━━━━━━━━━━━━━━━━━━━━━━━━━━ 8.0/8.0 MB 25.1 MB/s eta 0:00:00
Collecting asgiref<4,>=3.6.0
  Downloading asgiref-3.7.2-py3-none-any.whl (24 kB)
Collecting sqlparse>=0.3.1
  Using cached sqlparse-0.4.4-py3-none-any.whl (41 kB)
Installing collected packages: sqlparse, asgiref, django
Successfully installed asgiref-3.7.2 django-4.2.2 sqlparse-0.4.4
You can see that in addition to Django, two other dependencies are installed. These are sqlparse - used for exactly what it sounds like - and asgiref which is used to handle both asgi and wsgi application loading. These two specifications act as the interfaces between your Python application and your web server. The specific details on how these work are outside the scope of this project and article, but it’s good to get a general idea of how they work before moving any Python code for the web into production environments.
We can now go ahead and set up our application using a utility application provided by Django:
1
(rpgapi) $ django-admin startproject rpgapi .
Your project directory should look something like this:
1
2
3
4
5
6
7
8
.venv/
rpgapi/
  __init__.py
  asgi.py
  settings.py
  urls.py
  wsgi.py
manage.py
Let’s go ahead and initialize a git repository:
1
(rpgapi) $ git init
And we can add the requisite entries to a .gitignore file. I like this template as a starting place for my .gitignore. If you’re using a virtual environment, you’ll want to be sure to add the .venv/ directory to your .gitignore, as you do not want these files tracked.
Additional Dependencies
For this project, I’ll be using PostgreSQL. It is not a requirement to follow along, as I don’t currently plan on using any PostgreSQL-specific features. However, if you plan to follow along using PostgreSQL or MySQL, you’ll want to go ahead and install the appropriate dependencies for this.
We’ll be controlling our dependencies using a pyproject.toml file, so let’s go ahead and set up that up:
1
2
3
4
5
6
7
8
9
[project]
name = "RPG_API"
version = "1.0.0"
dependencies = [
  "Django==4.2.2",
  "djangorestframework",
  "psycopg2", # If using PostgreSQL
  "mysqlclient" # If using MySQL
]
With your dependencies defined, you can install them using pip install ..
If you’re using a MySQL or PostgreSQL database, go ahead and set up the database and create a user with permission to fully manage that database. Once that is done, let’s go ahead and configure our application.
Configuration
We’re going to be using a .env file for storing our project secrets, so we will need to go ahead and create it and install the module we’ll be using to read it. Create a file with the following information in it and name it .env.
1
2
3
4
5
6
SECRET_KEY=YOURREALLYLONGSECRETKEYFORSALTINGSECRETS
DB_USER=dbusername
DB_PASS=dbpassword
DB_NAME=rpgapidb
DB_HOST=localhost
DB_PORT=5432
To consume the .env file we’ll install one additional dependency. Add "django-environ" to your pyproject.toml dependency array and rerun pip install . to install the additional dependency.
Let’s go ahead and edit the rpgapi/settings.py file and make sure of our new environment variables.
1
2
3
4
5
6
7
8
9
10
11
12
13
14
15
16
17
18
19
20
"""
Django settings for rpgapi project.

Generated by 'django-admin startproject' using Django 4.2.2.

For more information on this file, see
https://docs.djangoproject.com/en/4.2/topics/settings/

For the full list of settings and their values, see
https://docs.djangoproject.com/en/4.2/ref/settings/
"""

from pathlib import Path
import environ

# Build paths inside the project like this: BASE_DIR / 'subdir'.
BASE_DIR = Path(__file__).resolve().parent.parent

env = environ.Env()
environ.Env.read_env(BASE_DIR / '.env)
Above, we go ahead and import the environ module on line 14 and initialize it for use on lines 18 and 19. We can now go through the settings file replacing secret values with calls to the env function:
1
2
3
4
5
6
7
8
9
10
11
12
13
14
15
16
17
18
# SECURITY WARNING: keep the secret key used in production secret!
SECRET_KEY = env('SECRET_KEY')

...

# Database
# https://docs.djangoproject.com/en/4.2/ref/settings/#databases

DATABASES = {
    'default': {
        'ENGINE': 'django.db.backends.postgresql',
        'NAME': env('DB_NAME'),
        'USER': env('DB_USER'),
        'PASSWORD': env('DB_PASS'),
        'HOST': env('DB_HOST'),
        'PORT': env('DB_PORT')
    }
}
Now that everything is configured, we can go ahead and test connectivity and get the initial migrations applied:
1
2
3
4
5
6
7
8
9
10
11
12
13
14
15
16
17
18
19
20
21
22
(rpgapi) $ python manage.py migrate
Operations to perform:
  Apply all migrations: admin, auth, contenttypes, sessions
Running migrations:
  Applying contenttypes.0001_initial... OK
  Applying auth.0001_initial... OK
  Applying admin.0001_initial... OK
  Applying admin.0002_logentry_remove_auto_add... OK
  Applying admin.0003_logentry_add_action_flag_choices... OK
  Applying contenttypes.0002_remove_content_type_name... OK
  Applying auth.0002_alter_permission_name_max_length... OK
  Applying auth.0003_alter_user_email_max_length... OK
  Applying auth.0004_alter_user_username_opts... OK
  Applying auth.0005_alter_user_last_login_null... OK
  Applying auth.0006_require_contenttypes_0002... OK
  Applying auth.0007_alter_validators_add_error_messages... OK
  Applying auth.0008_alter_user_username_max_length... OK
  Applying auth.0009_alter_user_last_name_max_length... OK
  Applying auth.0010_alter_group_name_max_length... OK
  Applying auth.0011_update_proxy_permissions... OK
  Applying auth.0012_alter_user_first_name_max_length... OK
  Applying sessions.0001_initial... OK
You may also want to take the additional step of setting up a superuser now, so you have an account to use to access the Django admin area:
1
2
3
4
5
6
(rpgapi) $ python manage.py createsuperuser
Username (leave blank to use 'bilbo'): bbaggins
Email address: bbagins@bagend.com
Password:
Password (again):
Superuser created successfully.
To confirm everything is working, you can go ahead and attempt to run the application using python manage.py runserver. The command will spin up a local web server and instruct you to browse to http://127.0.0.1:8000. You should see the initial Django screen congratulating you on a job well done setting up the project.
Characters
 Now that we have the foundation of the project in place, we can move on to the meat and potatoes: our data models. We will be very broadly laying out our data structure in today’s post, getting into more fine details in future posts. For now, we’ll concentrate on creating a “Character” model that represents a single game character and covers their most basic attributes.
Before we can get started creating a model, we need to create an “app” within our Django project and add it to the list of installed apps. We’ll call this app “characters” and create it using another Django command: python manage.py startapp characters. When you run this, a new directory named characters/ will appear in your project, with the following files within it:
1
2
3
4
5
6
7
8
9
characters/
  migrations/
    __init__.py
  __init__.py
  admin.py
  apps.py
  models.py
  tests.py
  views.py
Additionally, we’ll want to add the application to the list of installed apps in the settings.py file:
1
2
3
4
5
6
7
8
9
10
11
12
# Application definition

INSTALLED_APPS = [
    'django.contrib.admin',
    'django.contrib.auth',
    'django.contrib.contenttypes',
    'django.contrib.sessions',
    'django.contrib.messages',
    'django.contrib.staticfiles',
    # Custom Applications
    'characters',
]
Let’s go ahead and set up an initial model and get it set up within the Django admin so we can start playing with it!
The Character Model
Most models in Django will derive from the Model class provided by the framework. This handles a fair amount of work for us that we would otherwise have to repeat with every model we create. And if you haven’t come across it in the documentation yet, the Django maintainers are very serious about writing DRY code: Don’t Repeat Yourself.
We will also be using provided field types for our model which we can find in the models module, so we’ll want to make sure we import those at the top of the model.py file if they’re not already there.
We might start our model with two simple fields, like name and description.
1
2
3
4
5
6
from django.db import models

# Create your models here.
class Character(models.Model):
    name = models.CharField(max_length=255, null=False, blank=False)
    description = models.TextField(null=True, blank=True)
We may end up not keeping the description long term, but it provides us a good excuse to look at the main two text types fields Django provides out of the box: the CharField and the TextField. In addition to these two, there are several formatted text type fields such as the EmailField and URLField, which are essential CharFields with additional Validators to ensure the text being written to the field is an email or URL, respectively.
The CharField requires the max_length argument to be provided. The TextField on the other hand can have a max_length set, and this value will be applied to the validation on the front-end but is not enforced on the database level. This is due to the database backend using a different column type in most cases, with CharFields being VARCHAR(n) fields and TextFields being TEXT fields in the case of MySQL.
We also see above two different ways of controlling whether a field is required or not. The null attribute controls whether a column will be marked as nullable in the database schema. The blank attribute controls whether Django validation will require the field to have value before attempting to write it to the database. Combining these two attributes can be very useful in certain circumstances.
Let’s say you have a scenario where you want to dynamically set the value passed to the database based on user input, with a valid input being no value. You could define that field as blank=True null=False, allowing a field on the front end to be blank, but requiring you to set some value before passing it to the database, as the column will be created using the NOT NULL flag.
There are a lot of other little nuances like this when it comes to Django fields, allowing the framework to be reasonably flexible when it comes to data modeling. For now, however, let’s look at how we turn this code into an actual schema on a database.
Creating Migrations
To take our database model and create the corresponding database schema, we need to create a migration. This can be done by running one of the following (from least verbose to most):
1
2
3
(rpgapi) $ python manage.py makemigrations
(rpgapi) $ python manage.py makemigrations characters
(rpgapi) $ python manage.py makemigrations characters --dry-run -v 3
The first command would create migrations for all apps that have changed. The second would specifically create a migration for just the characters app. And the third command would show what migrations would be created for the characters app if the migration was created. Let’s look at the output of that last command:
1
2
3
4
5
6
7
8
9
10
11
12
13
14
15
16
17
18
19
20
21
22
23
24
25
26
27
(rpgapi) $ python manage.py makemigrations characters --dry-run -v 3
Migrations for 'characters':
  characters/migrations/0001_initial.py
    - Create model Character
Full migrations file '0001_initial.py':
# Generated by Django 4.2.2 on 2023-06-27 17:46

from django.db import migrations, models


class Migration(migrations.Migration):

    initial = True

    dependencies = [
    ]

    operations = [
        migrations.CreateModel(
            name='Character',
            fields=[
                ('id', models.BigAutoField(auto_created=True, primary_key=True, serialize=False, verbose_name='ID')),
                ('name', models.CharField(max_length=255)),
                ('description', models.TextField(blank=True, null=True)),
            ],
        ),
    ]
We notice a couple of things when looking at the output. First, we didn’t need to specify an ID field. This is done automatically for us because our model is derived from the models.Model class. Second, this migration is going to be an “initial” migration. This, along with the dependencies field becomes important as more migrations are added down the line, as it communicates the order in which migrations should be applied.
To create and apply this migration, go ahead and run the following:
1
2
(rpgapi) $ python manage.py makemigrations characters
(rpgapi) $ python manage.py migrate
This will take the instructions in the migration file and run them against your configured database. If you connect to your database, you should see a table named characters_character with 3 columns, id, name and description.
Admin Screen
We’re going to finish today’s post by giving us an easy interface for working with our new model. Luckily, Django provides an extremely simple way to interact with our models via the Django Admin interface.
To add the Character model to the admin screen, we can open the characters/admin.py file and add the following:
1
2
3
4
5
6
7
from django.contrib import admin
from .models import Character

# Register your models here.
@admin.register(Character)
class CharacterAdmin(admin.ModelAdmin):
    pass
We first import our Character model from .models. We can then add our CharacterAdmin class and derive it from admin.ModelAdmin. This will take care of most of the work of setting up the admin screens for us. To further simplify the setup process, we can configure the admin class using a class decorator, admin.register. The only thing we need to pass to this decorator function is the model being attributed to this ModelAdmin, in this case, the Character model.
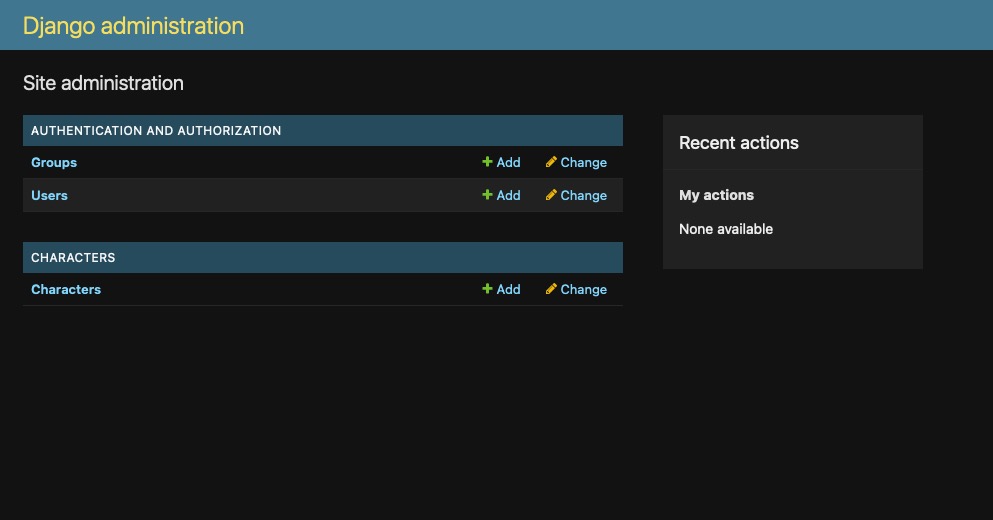
Go ahead and rerun the project and browser to http://127.0.0.1:8000/admin/. You should be greeted by a login screen. Once you log in with the superuser account we created earlier, you should be greeted by the Django Administration screen, and see the Users, Groups and Characters objects.
Go ahead and explore the Characters’ screens and try creating a new character. You should see the fields we defined in the model within the create and update views. However, after creating a character and returning to the list view, you might notice something strange. Each object in the list will be listed as “Character object(id)”.
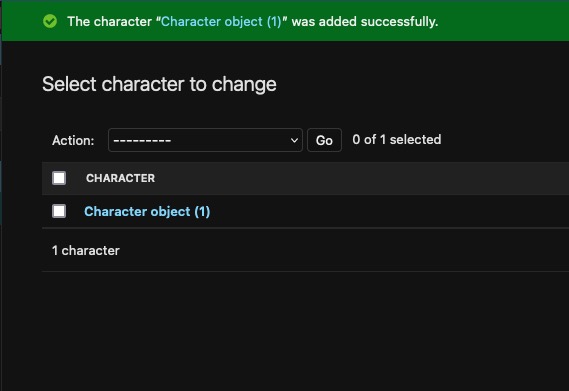
This is the default representation Django will use for any object when it’s cast to a string. To make this something more user-friendly, let’s override the __str__ function within our model.
Immediately after the fields, define a __str__ function that returns the value of the name field:
1
2
3
4
5
6
7
8
9
from django.db import models

# Create your models here.
class Character(models.Model):
    name = models.CharField(max_length=255, null=False, blank=False)
    description = models.TextField(null=True, blank=True)

    def __str__(self):
        return self.name
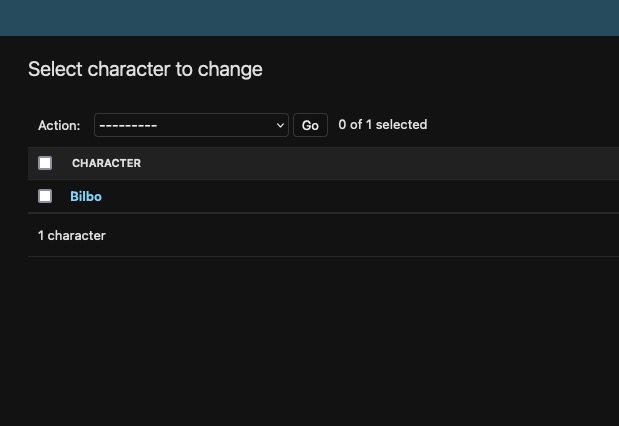
Save this and reload the list screen. You should immediately see your character objects being represented by the value of the name field.
Final Thoughts
This post was primarily foundational and I think will be helpful to those who haven’t worked within Django before. However, we’ve only scratched the surface and will be diving much deeper when we return to the topic in a couple of weeks. In that post, we will take a look at expanding our model to include some RPG elements like experience points and levels, deciding how or when we should calculate stats versus storing them, and then begin creating our serializers that will use to interface between our API endpoints and our model.
The full source code for this post can be found on GitHub! As I release each new post in this series, I will create a new release in GitHub so you can pull down the latest changes.
In next week’s post, I’ll be sharing my thoughts on our use of AI within production environments and the ethics, benefits and dangers surrounding its use.